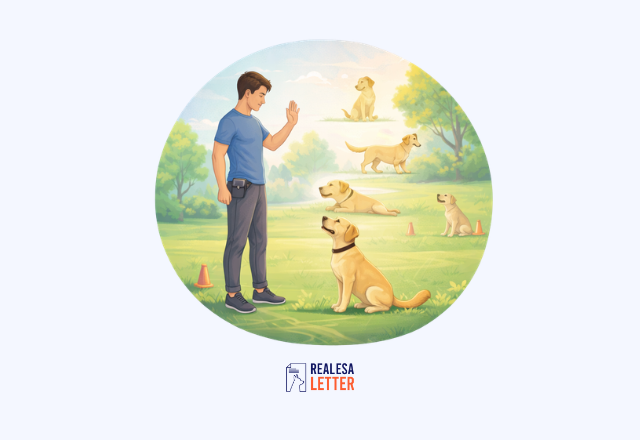
Picture this: you're walking your dog through a busy park, other dogs pass by, a cyclist zooms ahead, and your dog stays calmly at your side. Not pulling, not lunging, not dragging you off the sidewalk. That's what mastering the heel command looks like in real life.
Teaching a dog the "heel" command is one of the most practical and powerful things you can do as a dog owner. It goes beyond basic leash manners. When your dog knows how to heel, you gain precise control in crowded spaces, near traffic, around other animals, and in any situation where you need your dog right beside you and fully focused on you.
Let’s master heel training: meaning, gear, step-by-step methods, distractions, and off-leash progress.
What Does Heel Mean in Dog Training?
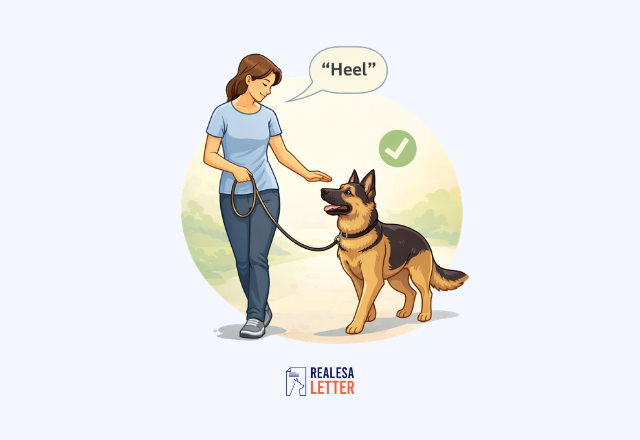
Heel means your dog walks beside you (traditionally on the left), keeping their neck or shoulder even with your leg, at whatever speed you set, without pulling, lagging, or drifting. The dog holds this position until you give a release command.
The left side is the traditional heel side, rooted in hunting and military dog handling, where the right hand held a weapon. That said, you can teach your dog to heel on either side. What matters most is consistency.
The heel command instructs your dog to walk directly beside you, typically on your left side, with their head or shoulder aligned with your hip or leg. The dog maintains this position whether you're walking forward, turning, changing pace, or stopping.
This is different from loose leash walking, which simply means your dog doesn't pull and stays within a comfortable range. Heel is a more formal, precise position that requires your dog to actively pay attention to your movements and adjust accordingly.
Why Is Teaching Heel Important
Before diving into the "how," it's worth understanding the "why." Here's what heel training actually does for you and your dog:
Safety first. A dog who heels reliably won't bolt into traffic, charge at another dog, or knock over a child. In high-risk moments like crossing a busy intersection, passing a reactive dog, or exiting a vehicle, the heel command can genuinely prevent accidents.
Builds communication and trust. Heel training requires your dog to watch you, follow your pace, and read your body language. Over time, this creates a stronger bond and a more attentive dog overall.
Makes walks more enjoyable. Dogs that pull make every walk a chore. A dog that heels transforms the walk into a pleasant, cooperative activity for both of you.
Foundation for advanced training. Heel is a cornerstone behavior. For dogs being trained as emotional support animals or psychiatric service dogs that require consistent obedience in public settings, the heel command is often among the first skills trained.
Organizations like RealESALetter.com recognize that a well-trained, well-behaved dog is essential for the ESA or service dog role to function effectively.
What You Need Before You Start
Equipment:
- A standard 4 to 6 foot leash
- A well-fitting flat collar or front-clip harness
- High-value training treats cut into small, pea-sized pieces
- A clicker (optional, but highly effective for marking correct behavior)
Prerequisites: commands your dog should know first:
- Sit – helps reset your dog between training attempts
- Watch me / Look – teaches eye contact, which supports attentive heeling
- Come – useful if your dog drifts away during training
- Stay – gives your dog the patience to hold position
If your dog doesn't know these yet, it's worth working through the foundational basic dog commands first. Heel is one of the more cognitively demanding commands, and dogs with a basic vocabulary learn it much faster.
Session length: Keep training sessions short: 3 to 5 minutes for adult dogs, and 2 to 3 minutes for puppies. Dogs learn better through frequent, short sessions than long, exhausting ones. Aim for 2 to 3 sessions per day, especially in the early stages.
Which Training Tools Work Best for Heel: And Which to Avoid
Clicker Training
A clicker marks the exact moment of correct behavior with a precise sound. This precision is especially valuable for heel because the correct position is fleeting your dog drifts in and out of it constantly in early training. A clicker lets you mark "yes, right there, that exact position" faster than any verbal cue.
How to use it for heel: Click the instant your dog's shoulder aligns with your leg. Not a second after — the moment. Follow every click with a treat. Once your dog understands position, you can start clicking for duration (holding position for 3 steps, then 5, then 10).
If you don't want to use a clicker: A sharp, consistent verbal marker like "yes!" works fine. Just use it the same way the instant the correct behavior happens, not after.
Front-Clip Harness
A front-clip harness has the leash attachment point on the dog's chest rather than their back. When a dog pulls, the front clip rotates their body back toward you, naturally reducing forward momentum.
Best for: Moderate pullers in the early stages of heel training. It buys you management while the heel behavior is being built.
Limitation: It's a management tool, not a training tool. It reduces pulling but doesn't teach heel. Use it as a bridge while training, not as a permanent solution.
Recommended fit check: You should be able to fit two fingers under every strap. Too loose and it shifts to the side; too tight and it restricts shoulder movement.
Head Halter (Gentle Leader, Halti)
A head halter fits around your dog's nose and behind their ears. When the dog pulls, the head turns back toward you — wherever the head goes, the body follows. It gives you significant steering control with minimal physical effort.
Best for: Strong pullers, large breeds, or dogs whose pulling makes training sessions physically impossible.
Important: Introduce the head halter slowly. Most dogs are initially uncomfortable with something on their face. Spend 3–5 sessions just getting your dog comfortable wearing it before attaching a leash.
Limitation: Some dogs find head halters aversive watch for persistent pawing at the face or stress signals. If your dog is consistently distressed, switch to a front-clip harness instead.
Standard Flat Collar
Works well for dogs who are not strong pullers and are in the intermediate to advanced stages of heel training. For early training with a dog that pulls, a flat collar puts strain on the trachea and doesn't give you any steering advantage.
What to Avoid
Retractable leashes: These physically reward pulling the dog learns that pulling extends the leash. They also give you no control for heel training. Avoid entirely during any training period.
Shock collars (e-collars): Even trainers who use e-collars professionally do not recommend them for beginner heel training. The timing precision required to use them ethically is difficult for most owners, and mistakes create lasting behavioral problems.
Step-by-Step Teaching Heel Dog Command
Most dogs don't fail at heel because they're stubborn or untrainable. They fail because their owners skipped steps, rushed the process, or only practiced in the living room. The steps below are sequenced deliberately: each one builds on the last.
Work through them in order, and don't move forward until your dog is succeeding consistently at the current stage. A solid heel takes time, but every session gets you closer to a dog that genuinely walks with you instead of dragging you along.
Step 1: Set Up the Starting Position
Begin indoors with minimal distractions, in a hallway, a quiet room, or a backyard. Ask your dog to sit on your left side, with their nose roughly level with your left leg. Hold a treat in your left hand, low near your hip, to draw your dog's attention to the correct position.
Don't say "heel" yet. You're just introducing the physical position at this stage.
Step 2: Get Your Dog's Attention
With your dog sitting at your left side, say their name and let them sniff the treat in your hand. Make eye contact if you can. You want your dog focused on you, not on the environment.
If you're using a clicker, this is a good moment to reinforce eye contact. Click and treat the moment your dog looks up at your face.
Step 3: Take Your First Steps and Introduce the Movement
Say "heel" in a clear, calm voice. Take one step forward with your left foot first. Your left foot moving is a natural visual cue for your dog to move with you.
Hold the treat at your hip to guide your dog forward. As soon as they move with you and stay in position for even one step, click (or say "yes!") and reward immediately.
Repeat this process: one or two steps, then reward. Don't rush. At this stage, you're teaching your dog that "heel" means "walk right here beside me and good things happen."
Step 4: Build Duration Gradually
Once your dog consistently follows for one or two steps, start extending the number of steps before rewarding. Go from 2 steps to 5, then 5 to 10, then 10 to 20. Always mark (click or "yes") and reward before your dog breaks position.
Introduce changes in direction slowly. Turn left, turn right, make a U-turn. Say "heel" before each turn to cue your dog to stay with you. Reward generously when your dog successfully follows through a turn.
A useful technique here: change direction frequently and unpredictably. This teaches your dog to pay attention to you rather than assuming where you're going.
Step 5: Add Pace Changes
Once your dog is doing well at a consistent pace, introduce slow walking and faster walking. Cue the change verbally with "easy" (slow) or "hurry" (fast) while maintaining the heel command. Your dog needs to learn that heel position is maintained no matter the speed.
When you stop, cue your dog to sit automatically beside you. Many trainers teach an "automatic sit" where the dog sits every time the handler stops, without being asked. This adds polish to the behavior and is often required in formal obedience competition.
Step 6: Fade the Treat Lure
Once your dog clearly understands heel position, begin fading the treat from your guiding hand. Continue to reward from a treat pouch or pocket, but stop using the food to lure the dog into position. The verbal cue and muscle memory should now be doing the work.
Gradually move toward a variable reward schedule: reward every third step, then every fifth, then randomly. Random reinforcement actually produces more reliable behavior than rewarding every single time.
Step 7: Proof Against Distractions
This is where most training programs fall short. Teaching heel in a quiet living room is one thing; maintaining it when a squirrel runs past is another challenge entirely.
Gradually introduce distractions in a controlled way:
- Stage 1: Train in your yard with mild environmental distractions (birds, wind, scents)
- Stage 2: Train in a quiet neighborhood street
- Stage 3: Train near a park or pet store with people and other dogs at a distance
- Stage 4: Train in increasingly busy environments
Each time you add a new distraction, expect to lower your criteria. Reward more frequently and accept shorter durations of heel before giving your dog a break. Proofing takes weeks to months of consistent practice.
Alternative Method: Teaching Heel With Hand Targeting
The lure method works well for most dogs. But some dogs are not motivated by food in their early training environment, or they fixate on the treat in your hand rather than learning the position. Hand targeting is an excellent alternative — and many competition trainers prefer it because it builds intense focus and enthusiasm.
What is hand targeting? Hand targeting (also called the "touch" command) means your dog learns to touch their nose to your open palm on cue. Once your dog understands touch reliably, you use your hand as a moving target to guide them into and maintain the heel position.
How to teach the touch command first:
- Hold your open palm 2–3 inches in front of your dog's nose
- Most dogs will sniff or nose your hand out of curiosity click and treat the instant they make contact
- Repeat 10–15 times until your dog is deliberately targeting your hand
- Add the cue word "touch" just before presenting your palm
- Once reliable, begin moving your hand slightly so your dog has to follow it to touch
Transitioning touch to heel:
- Stand with your dog on your left side
- Hold your left hand at your left hip, palm facing your dog. Their nose should reach it naturally when they're in heel position
- Cue "touch" your dog moves into heel position to target your hand
- Click and treat
- Take one step forward, repositioning your hand at your hip, cue "touch" again
- Gradually extend the number of steps between touches
- Once your dog is following your hand reliably at heel, add the verbal "heel" cue and fade the "touch" cue over time
Why this method produces great results: Your dog is actively driving toward your hand, which creates a forward, engaged heel position rather than a dog lagging behind a lure. It also builds the habit of watching your left hip a natural focal point that helps with turns and pace changes.
Common Handler Mistakes That Undermine Heel Training
Most heel training problems come from the handler, not the dog. These are the most common mistakes owners make without realizing it.
Repeating the cue word
Saying "heel, heel, heel, HEEL" while your dog ignores you teaches your dog that the first "heel" means nothing the real cue is the fourth repetition delivered in a frustrated voice. Say the cue once. If your dog doesn't respond, guide them into position with your treat hand and reward. Cue, one time.
Inconsistent reinforcement timing
Rewarding your dog when they are slightly ahead of, or behind, the correct position teaches them a fuzzy approximation of heel. Precision in your reward timing creates precision in your dog's positioning. If you're not sure whether your dog was in position when you clicked, they probably weren't.
Staring at your dog during heel
Many owners look down at their dog constantly during heel training. This causes two problems: your dog looks up at your face rather than maintaining a forward heel position, and it causes you to unconsciously slow your pace and drift off your walking line. Look straight ahead and trust your peripheral vision to monitor your dog's position.
Nagging on the leash
Light, constant leash pressure, even unintentional, teaches your dog to ignore leash input. If you're always holding slight tension, your dog has no information contrast between "leash is asking me to do something" and "everything is normal." Keep the leash completely loose at all times during heel training. Every correction should be a brief, clear signal, not a constant background pressure.
Training in the same place every session
Your kitchen is not the world. If every session happens in the same location, your dog learns "heel in the kitchen" not heel as a generalized behavior. Vary your training location starting in week two.
Ending sessions when your dog is failing
Always end a session on a success even if you have to make the last rep very easy to guarantee it. Ending on failure creates a negative association with the training session that carries into the next one. If your dog is struggling, drop back to something they can succeed at (even just a sit beside you), reward them, and call the session done.
Teaching Heel to a Puppy vs. an Adult Dog
A 10-week-old puppy and a 4-year-old rescue are both capable of learning heel, but they are not the same student. What works beautifully for one can frustrate the other.
The biggest mistake owners make here is applying the same timeline, the same session length, and the same level of expectation to dogs that are at completely different stages of development and have completely different training histories.
Before you start, it helps to know which scenario you're working with. A puppy is still building its ability to focus, regulate impulses, and retain information between sessions.
An adult dog that has pulled for years has essentially been reinforced for that behavior thousands of times. Neither is a lost cause, but each needs a different approach right from the first session.
Puppies (8 Weeks and Up)
Puppies can start learning heel basics as early as 8 weeks old, but keep expectations proportional to their developmental stage. Attention spans are short, so 1 to 2 minutes per session is appropriate.
Focus on getting them comfortable walking beside you and introduce the verbal cue early. If you're still working on foundations like how to potty train a puppy, tackle that first before introducing heel, as splitting a puppy's training across too many new skills at once slows progress on all of them.
Avoid formal, rigid heel training with very young puppies. Think of it as "heel-ish" behavior: walking calmly near your side with loose leash manners, and formalize it as they mature.
Adult Dogs
Adult dogs who have spent years pulling on leash have deeply ingrained habits. The training process is the same, but patience and consistency are even more critical. Some adult dogs may initially need management tools like a front-clip harness or head halter to make training sessions productive while the new behavior is being built.
Never use choke chains, prong collars, or shock collars for heel training. These tools may suppress behavior in the short term but damage trust and can cause anxiety or aggression long-term. Positive reinforcement is both more effective and more humane.
How to Teach Heel Based on Your Dog's Breed Type
Not all dogs heel the same way. A Border Collie and a Basset Hound need completely different approaches. Understanding your dog's breed drives what they were originally bred to do helps you train smarter and troubleshoot faster.
High-Energy / Working Breeds
(German Shepherd, Belgian Malinois, Border Collie, Australian Shepherd)
These dogs have intense drive and need a job. They often excel at heel because they love having a defined task. The challenge is channeling that energy — they can become overly focused, forge ahead, or become frustrated if sessions feel too slow.
- Keep sessions fast-paced and engaging
- Use high-value rewards and animated praise — flat affect won't hold their attention
- Introduce directional changes frequently to keep them mentally stimulated
- These breeds often progress to off-leash heel faster than average
Scent Hounds
(Beagle, Basset Hound, Bloodhound, Coonhound)
Scent hounds are bred to follow their nose — their nose is literally their brain on walks. Heel training competes directly with thousands of years of instinct.
- Use extremely high-value food rewards (these dogs are highly food motivated)
- Train on a surface with fewer scent distractions first — concrete before grass
- Keep sessions very short (2–3 minutes) — nose fatigue is real and focus drops fast
- Accept slower progress — a reliable heel in low-distraction environments is a win for this group
- Never punish sniffing — redirect with treats and praise instead
Sighthounds
(Greyhound, Whippet, Saluki, Afghan Hound)
Sighthounds are triggered by movement — a squirrel, a cyclist, a blowing leaf. Their prey drive can be so strong that they become deaf to all commands when triggered.
- Train at maximum distance from movement-based distractions to start
- Use a front-clip harness or head halter — sighthounds can generate explosive force on a flat collar
- Manage expectations: a reliable heel in a park may always require more distance from distractions than other breeds
- Focus on getting a solid heel in calm environments before ever attempting near traffic or dogs
Brachycephalic (Flat-Faced) Breeds
(French Bulldog, English Bulldog, Pug, Shih Tzu)
These breeds have compromised airways and overheat easily. Heel training needs to account for their physical limitations.
- Keep sessions under 3 minutes, especially in warm weather
- Avoid training in heat or humidity — these dogs cannot cool themselves efficiently
- Never use a collar — always use a well-fitting harness to avoid airway compression
- Watch for heavy panting as a signal to stop, not push through
- Progress will be slower, but these breeds are intelligent and motivated by food
Toy Breeds
(Chihuahua, Yorkshire Terrier, Maltese, Toy Poodle)
Toy breeds are often undertrained because owners don't see them as a pulling hazard. But a dog that won't heel is still a dog that won't heel — and toy breeds are capable of learning precise heel just as well as large breeds.
- Everything is proportional: one step forward is a bigger commitment for a tiny dog
- Get on their level — crouching or using a lower treat position makes early sessions much easier
- Be aware of big-dog intimidation: train away from large dogs until heel is solid
- Use tiny, high-value treats cut even smaller — treat size matters for small mouths
Independent / Stubborn Breeds
(Basset Hound, Chow Chow, Shiba Inu, Bulldog, Afghan Hound)
These breeds aren't being defiant — they were bred to make independent decisions. Heel training requires them to defer to you, which goes against their instincts.
- Find the right reward: some independent breeds respond better to toys or play than food
- Never use force or corrections — it increases resistance in these breeds
- Keep sessions very short and always end on a success, even a small one
- Build value for heel position slowly — these dogs need to decide they want to heel, not be compelled to
Off-Leash Heel Training
Once your dog reliably heels on leash in a variety of environments, you can begin practicing off-leash. This is an advanced skill that requires a solid training foundation.
Steps for off-leash heel:
- Start in a safely enclosed, distraction-free area. A fenced yard is ideal.
- Drop the leash on the ground (don't remove it yet) and practice as normal.
- Gradually pick the leash up less and less until you're walking without holding it.
- Finally, remove the leash entirely and practice inside the enclosure.
- Only add distractions and new environments once off-leash heel is solid in the safe space.
If you're also working on keeping your dog within property boundaries, pairing heel with how to train your dog to stay in the yard creates a powerful combination of off-leash control skills.
Never practice off-leash heel in unfenced areas until you are 100% confident in your dog's recall and heel reliability. Obey all local leash laws.
Common Heel Training Mistakes (and How to Fix Them)
Heel training breaks down in predictable ways, and most of the time it is not the dog's fault. The mistakes below are ones almost every owner makes at some point, usually without realizing it. Recognizing them early saves you weeks of retraining and keeps your dog from learning the wrong version of the behavior.
Mistake 1: Saying "heel" repeatedly.
Saying the word over and over dilutes the cue. Say it once clearly. If your dog doesn't respond, guide them into position and try again.
Mistake 2: Training sessions that are too long.
Dogs lose focus and begin making mistakes when sessions drag on. Stop before your dog starts failing, not after.
Mistake 3: Moving too fast in the environment.
Don't take your training straight from the living room to a busy dog park. Gradually raise the difficulty level of the environment.
Mistake 4: Forgetting the release command.
Heel is a command, which means it must have a release. Use a consistent word like "free," "okay," or "break" to signal to your dog that they're no longer required to maintain heel position. Without a release, dogs begin self-releasing, which undermines the behavior.
Mistake 5: Not rewarding in position.
Always deliver the treat to your left hip, right where you want your dog's head to be. Reaching out in front of you or bending down to give the reward pulls your dog out of position and inadvertently trains them to drift forward.
Heel vs. Loose Leash Walking: Which Should You Teach?
The answer is both, but use them at different times.
Heel is a formal, focused command. Use it when precision matters: crossing a street, passing another dog, walking through a crowd, entering a building. It requires active attention from your dog.
Loose leash walking (sometimes cued with "let's go" or "with me") is the everyday walking mode. Your dog can sniff, explore, and move within the leash's range. They just can't pull. This is the appropriate mode for most of a normal walk, because sniffing and exploring are mentally enriching for dogs.
Teaching both gives your dog clarity about what's expected in any given moment, and it makes walks both functional and enjoyable.
Training Tools That Can Help
Tool | Best For | Notes |
Flat collar | Standard training, mild pullers | Simple and effective |
Dogs that back out of collars | Tightens slightly without choking | |
Front-clip harness | Moderate to strong pullers | Reduces pulling without pain |
Head halter (Gentle Leader, Halti) | Strong pullers, reactive dogs | Requires acclimation period |
Clicker | Precise behavior marking | Consistent, clear communication |
Treat pouch | Hands-free reward delivery | Keeps treats accessible |
Avoid: Choke chains, prong collars, shock/e-collars. These can cause physical harm and psychological damage.
How Long Does It Take to Teach a Dog to Heel?
There is no single answer. It depends on your dog's age, temperament, prior training history, and how consistent you are with practice. A food-motivated Labrador with no prior leash training will likely progress faster than a reactive terrier mix that has spent three years pulling. That does not mean one dog is smarter than the other. It means the variables are different.
What the timeline below reflects is an average range for dogs trained with consistent positive reinforcement. Your dog may move faster through some stages and slower through others, and that is completely normal.
The stage that trips up most owners is distraction proofing, because it requires starting over in new environments rather than picking up where you left off. Treat each new location as step one of that stage, not a continuation of the previous one.
As a general timeline:
- Basic heel position (indoor, low-distraction): 1 to 2 weeks
- Consistent heel on leash in familiar environments: 4 to 6 weeks
- Reliable heel with distractions: 3 to 6 months
- Off-leash heel in varied environments: 6 to 12+ months
Consistency is the single biggest factor. A dog trained for 5 minutes every day will outperform a dog trained for an hour once a week, every time. Short, frequent sessions keep the behavior fresh, prevent frustration on both ends of the leash, and build the kind of muscle memory that holds up when it actually matters.
Using the Heel Command in Real-Life Situations
Training is one thing. Here's how heel applies to the situations you actually face day-to-day.
Crossing a busy street
Cue heel before stepping off the curb. Your dog should be tight to your left side, not investigating the curb or pulling toward traffic. If your dog can't maintain heel at a street corner, they are not ready for off-leash work.
Passing a reactive or aggressive dog
Increase distance before you cue heel you want your dog in position before stress kicks in, not trying to get them there during a tense moment. Use a calm, low voice. Keep moving at a steady pace. Reward heavily once you're past.
Navigating crowds (markets, festivals, busy sidewalks)
This is where heel earns its reputation. Cue heel before entering the crowd, not after your dog is already tangled in strangers' legs. Reward every 5–10 steps through the crowd. Use a shorter leash grip closer handling gives you more control without tension.
Entering and exiting vehicles
Teach your dog to sit in heel position before you open the car door, and to hold that position until you give a release cue. This prevents bolting and door-charging one of the most common causes of dog injuries in parking lots.
Passing food on the ground
Cue heel the moment you see food on the ground ahead. The forward movement of heel keeps your dog's focus on position rather than scavenging. Reward generously once past this is a high-distraction scenario that deserves high-value reinforcement.
Walking through doorways and gates
Use heel at every threshold doorways, gates, car doors, elevator doors. Your dog should wait for your cue before moving through. This habit, built through consistent heel practice, prevents bolting and establishes a pattern of deference at boundaries.
Heel Training for Emotional Support Animals and Psychiatric Service Dogs
For owners of emotional support animals (ESAs) or psychiatric service dogs (PSDs), reliable heel is more than a convenience it's a functional necessity.
Why heel matters more in public access contexts
ESAs and PSDs accompany their owners into environments that require precise, predictable behavior: medical offices, airports, housing common areas, and crowded public spaces.
A dog that pulls, surges, or drifts unpredictably undermines the handler's ability to manage their own symptoms and draws negative attention that can affect access rights.
A solid heel:
- Keeps the dog close during anxiety or panic episodes when the handler needs immediate grounding contact
- Prevents the dog from becoming a distraction or liability in sensitive environments
- Demonstrates the handler's control, which is often evaluated by housing providers, airlines, and medical facilities
- Reduces the handler's own cognitive load, a dog that manages itself frees mental bandwidth for the handler
Heel as a grounding behavior
For handlers managing anxiety, PTSD, or panic disorders, the act of cueing heel and having the dog respond predictably can itself serve as a grounding mechanism a concrete, controllable interaction during a moment of distress. The tactile contact of the dog against the handler's leg is an additional calming input.
Training considerations for ESA/PSD owners
- Train heel in the specific environments where your dog will be used. The heel that works at home needs to transfer to medical offices, transit, and housing common areas
- Practice automatic sitting at every elevator, doorway, and waiting area. The "settle beside me" default is exactly the behavior public-access environments require
- If you are working toward PSD certification or public access testing, check the specific heel standards required by your evaluator; some require a formal left-side heel; others accept close walking with attention
In conclusion, teaching your dog the heel command is not a one-week project. It is an ongoing training relationship built session by session, reward by reward. The dogs that heel beautifully through crowds and past distractions got there through weeks and months of consistent, positive training, not a single magic method.
Start small. Celebrate every step in the right direction. Keep sessions short and fun. And remember that the goal is not robotic perfection. It's a dog who genuinely enjoys working with you and knows how to stay close when it matters most.
For dog owners whose pets serve as emotional support animals, developing this level of training and attentiveness can make daily life significantly more manageable. A dog with reliable obedience is also far better positioned for emotional support dog training and formal emotional support dog certification.
If you're exploring the emotional support animal process and wondering how to get an ESA letter for my dog, resources like RealESALetter.com can guide you through understanding ESA documentation requirements alongside your dog's behavioral development.
The heel command is one of the most rewarding things you can teach your dog. Once it's solid, every walk becomes proof of the trust and communication you've built together.
Frequently Asked Questions
What is the hardest dog command?
The hardest dog command varies by dog, but heel and stay under heavy distractions are often considered the most challenging. Both require strong impulse control, sustained attention, and reliability in stimulating environments. Off-leash recall can also be extremely difficult to perfect consistently.
What does the heel command mean for a dog?
The heel command tells your dog to walk at your side, typically your left, with their shoulder or neck aligned with your leg. Your dog should match your pace, stop when you stop, and maintain position until you give a release command. It is a more precise, formal position than standard loose leash walking.
What age should I start teaching my dog to heel?
You can introduce heel basics as early as 8 weeks with short, positive sessions. However, formal heel training with expectations of precision is best begun around 4 to 6 months, when puppies have longer attention spans and better impulse control. Adult dogs can learn to heel at any age.
How do I get my dog to stop pulling and heel properly?
Stop moving every time your dog pulls. Forward movement is your dog's reward for pulling, so removing it is your most powerful tool. Redirect your dog back to heel position, reward them when they're beside you, and restart walking. Combine this with regular heel training sessions and a front-clip harness if needed.
Should I use a clicker to teach heel?
A clicker is not required, but it is highly effective. It allows you to mark the exact moment your dog is in the correct position with a precise, consistent signal. If you don't have a clicker, a short verbal marker like yes! works equally well. Just use it consistently.
Is it better to teach heel on the left or right side?
The traditional side is the left, rooted in hunting and military dog handling traditions. AKC obedience competition also uses the left side as the standard. That said, you can train your dog to heel on either or both sides. The key is consistency. Pick one side and stick to it, at least initially.
How do I proof heel training against distractions?
Start training in low-distraction environments and gradually add more challenging ones: your yard, a quiet street, a park perimeter, then busy areas. Every time you increase difficulty, reward more frequently and expect shorter durations of attention. This slow, systematic process called proofing is how you build a reliable heel in the real world.
Should you exercise your dog before heel training?
Yes, but not to exhaustion.
A dog that is bouncing off the walls from pent-up energy will struggle to focus on precise positioning. A 10–15 minute walk, play session, or fetch game before training takes the edge off and makes focus easier.
However, training a completely exhausted dog is equally unproductive. A tired dog offers slow, mechanical behavior rather than engaged, attentive heeling. The goal is a dog that is calm but alert, physically settled enough to think.
The same applies to meal timing. Training before meals (when your dog is slightly hungry) rather than immediately after eating gives you more leverage with food rewards.

WRITTEN BY
Dr. Avery Langston
Dr. Avery Langston is a licensed clinical therapist with more than 12 years of professional experience in emotional support animal (ESA) assessments, mental health counseling, and evidence-based therapeutic interventions. With a strong foundation in clinical psychology and a passion for mental-health education, Avery has guided thousands of individuals through the ESA qualification process while promoting emotional healing and stability. As a senior content contributor for RealESALetter.com, Avery focuses on writing accurate, accessible, and legally informed articles on ESA rights, housing protections, and mental wellness. Her mission is to help readers understand their ESA benefits clearly and confidently, backed by real clinical expertise.

Share this Article